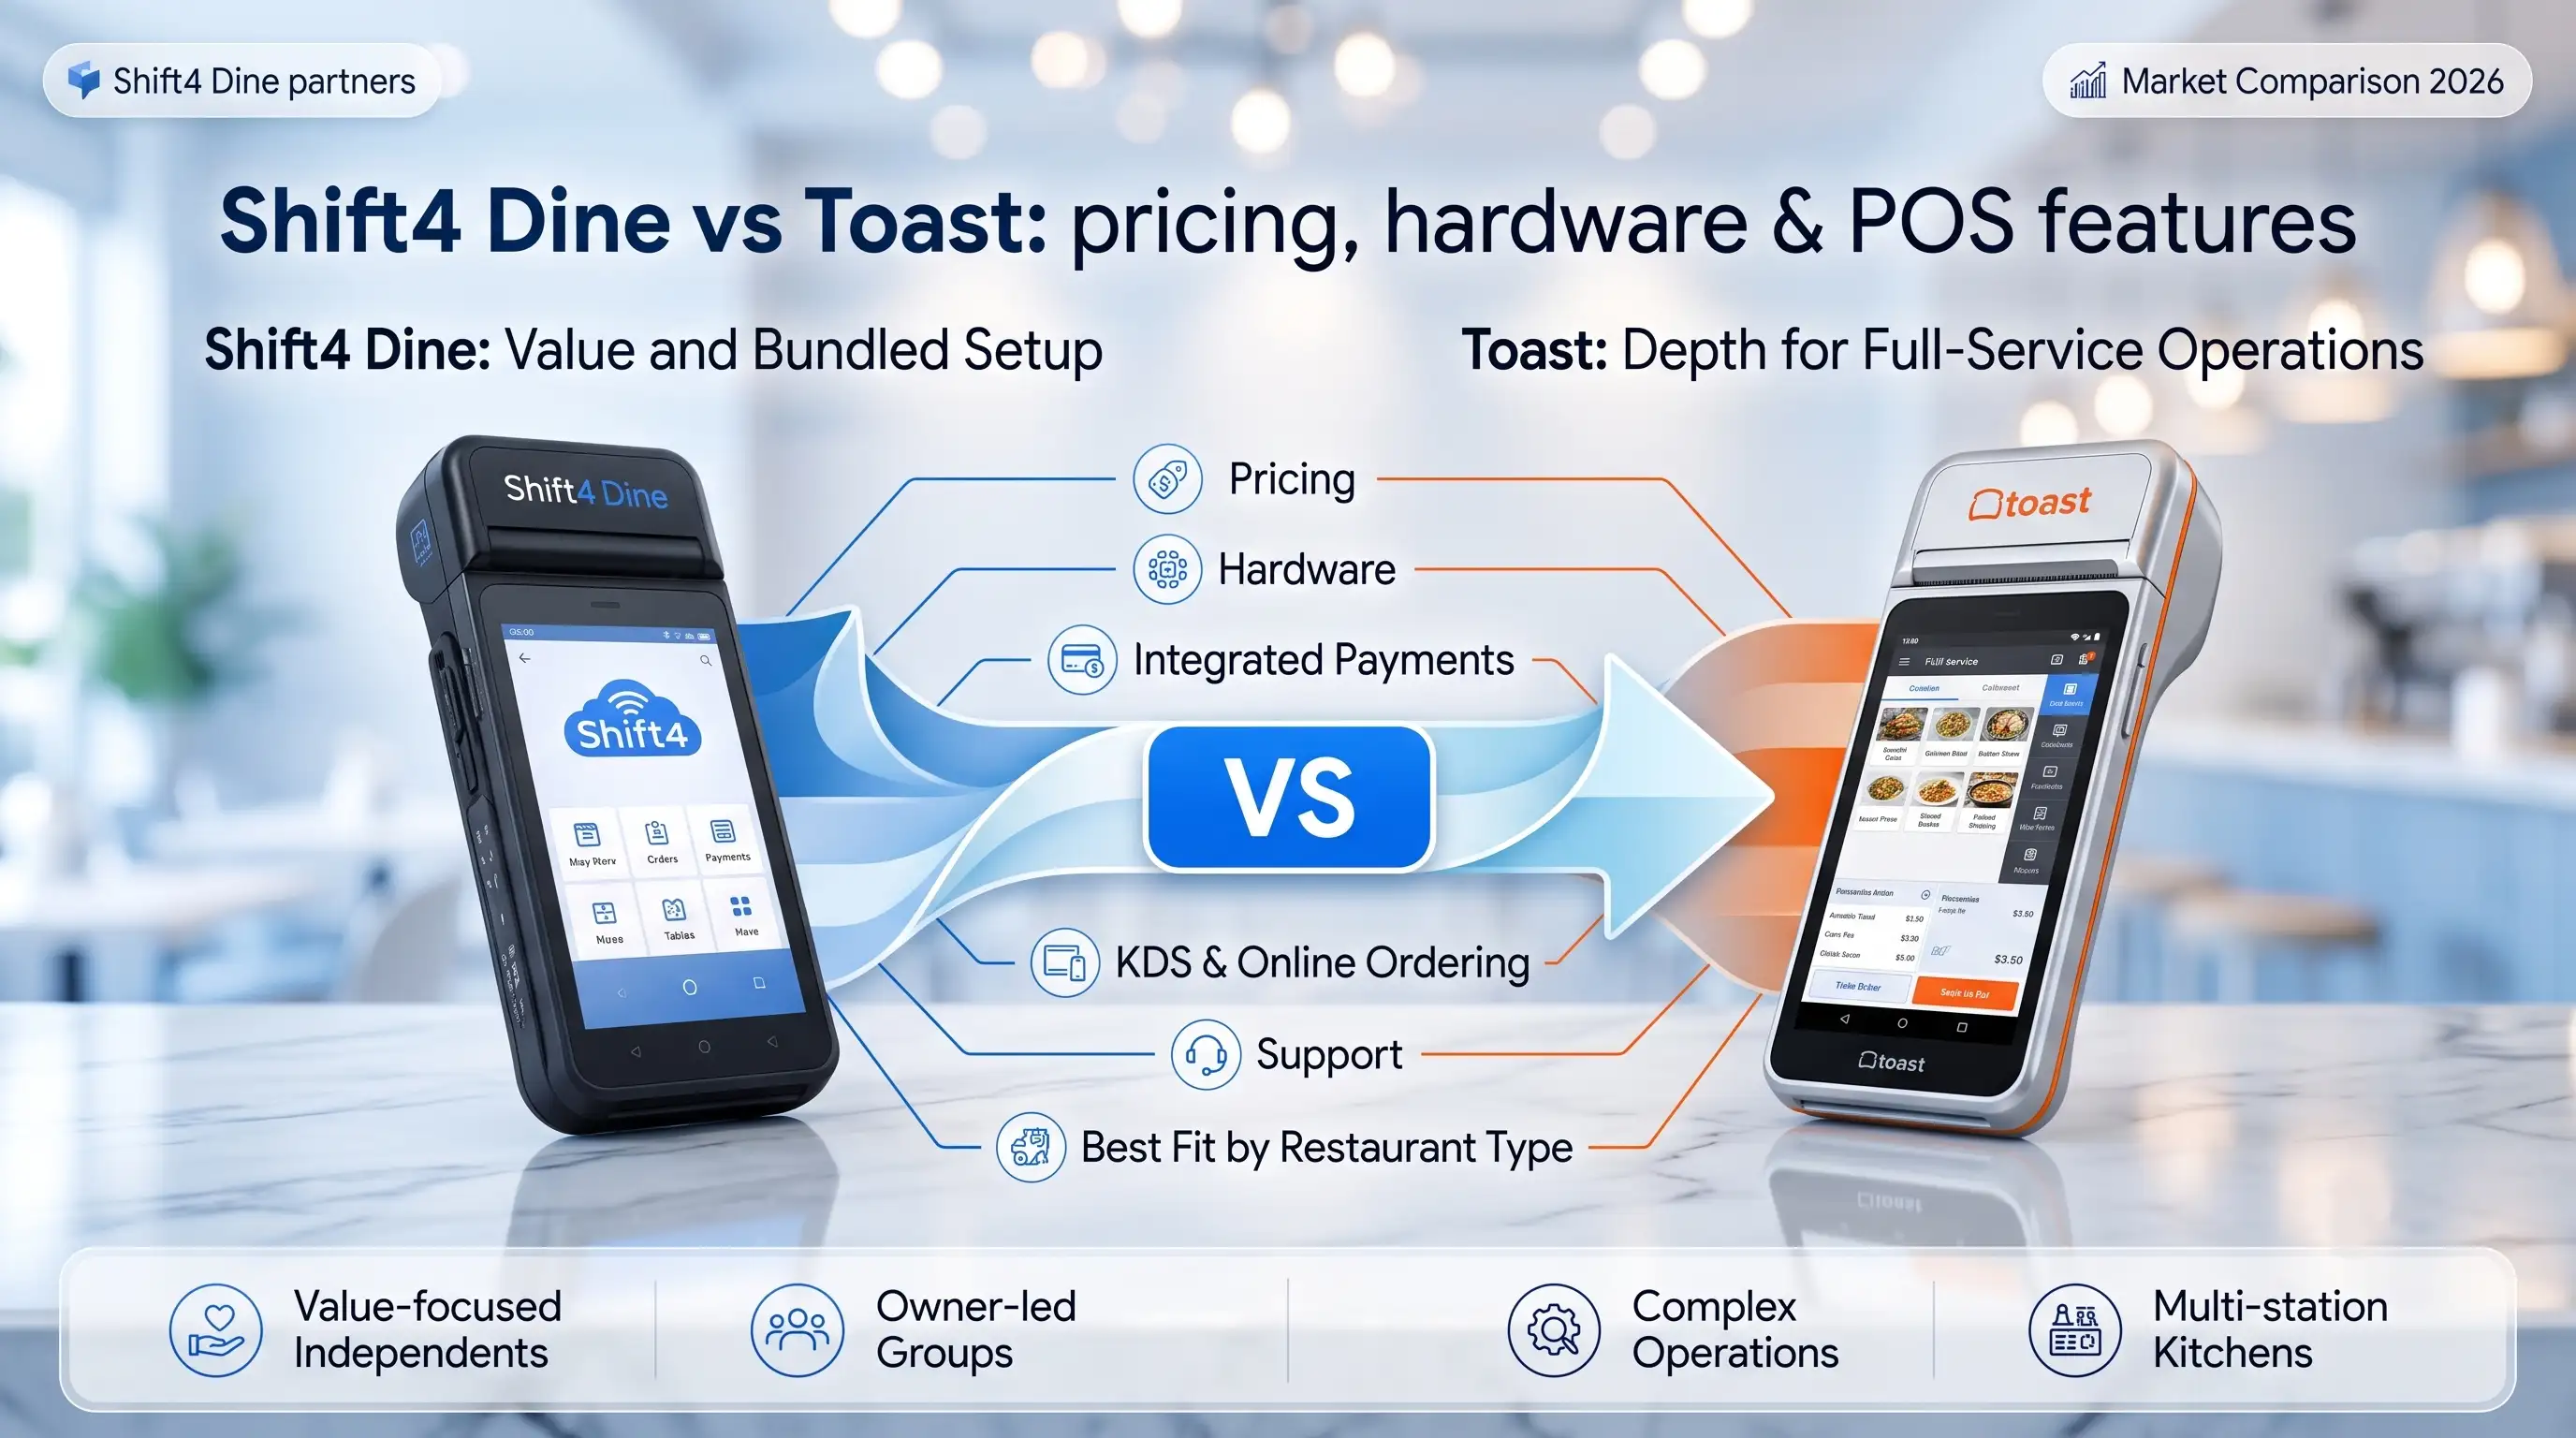
Shift4 Dine vs Toast: which restaurant POS fits your business?
TL;DR — The fast answer before you read further: Choose Shift4 Dine if you want bundled hardware, integrated payments, and




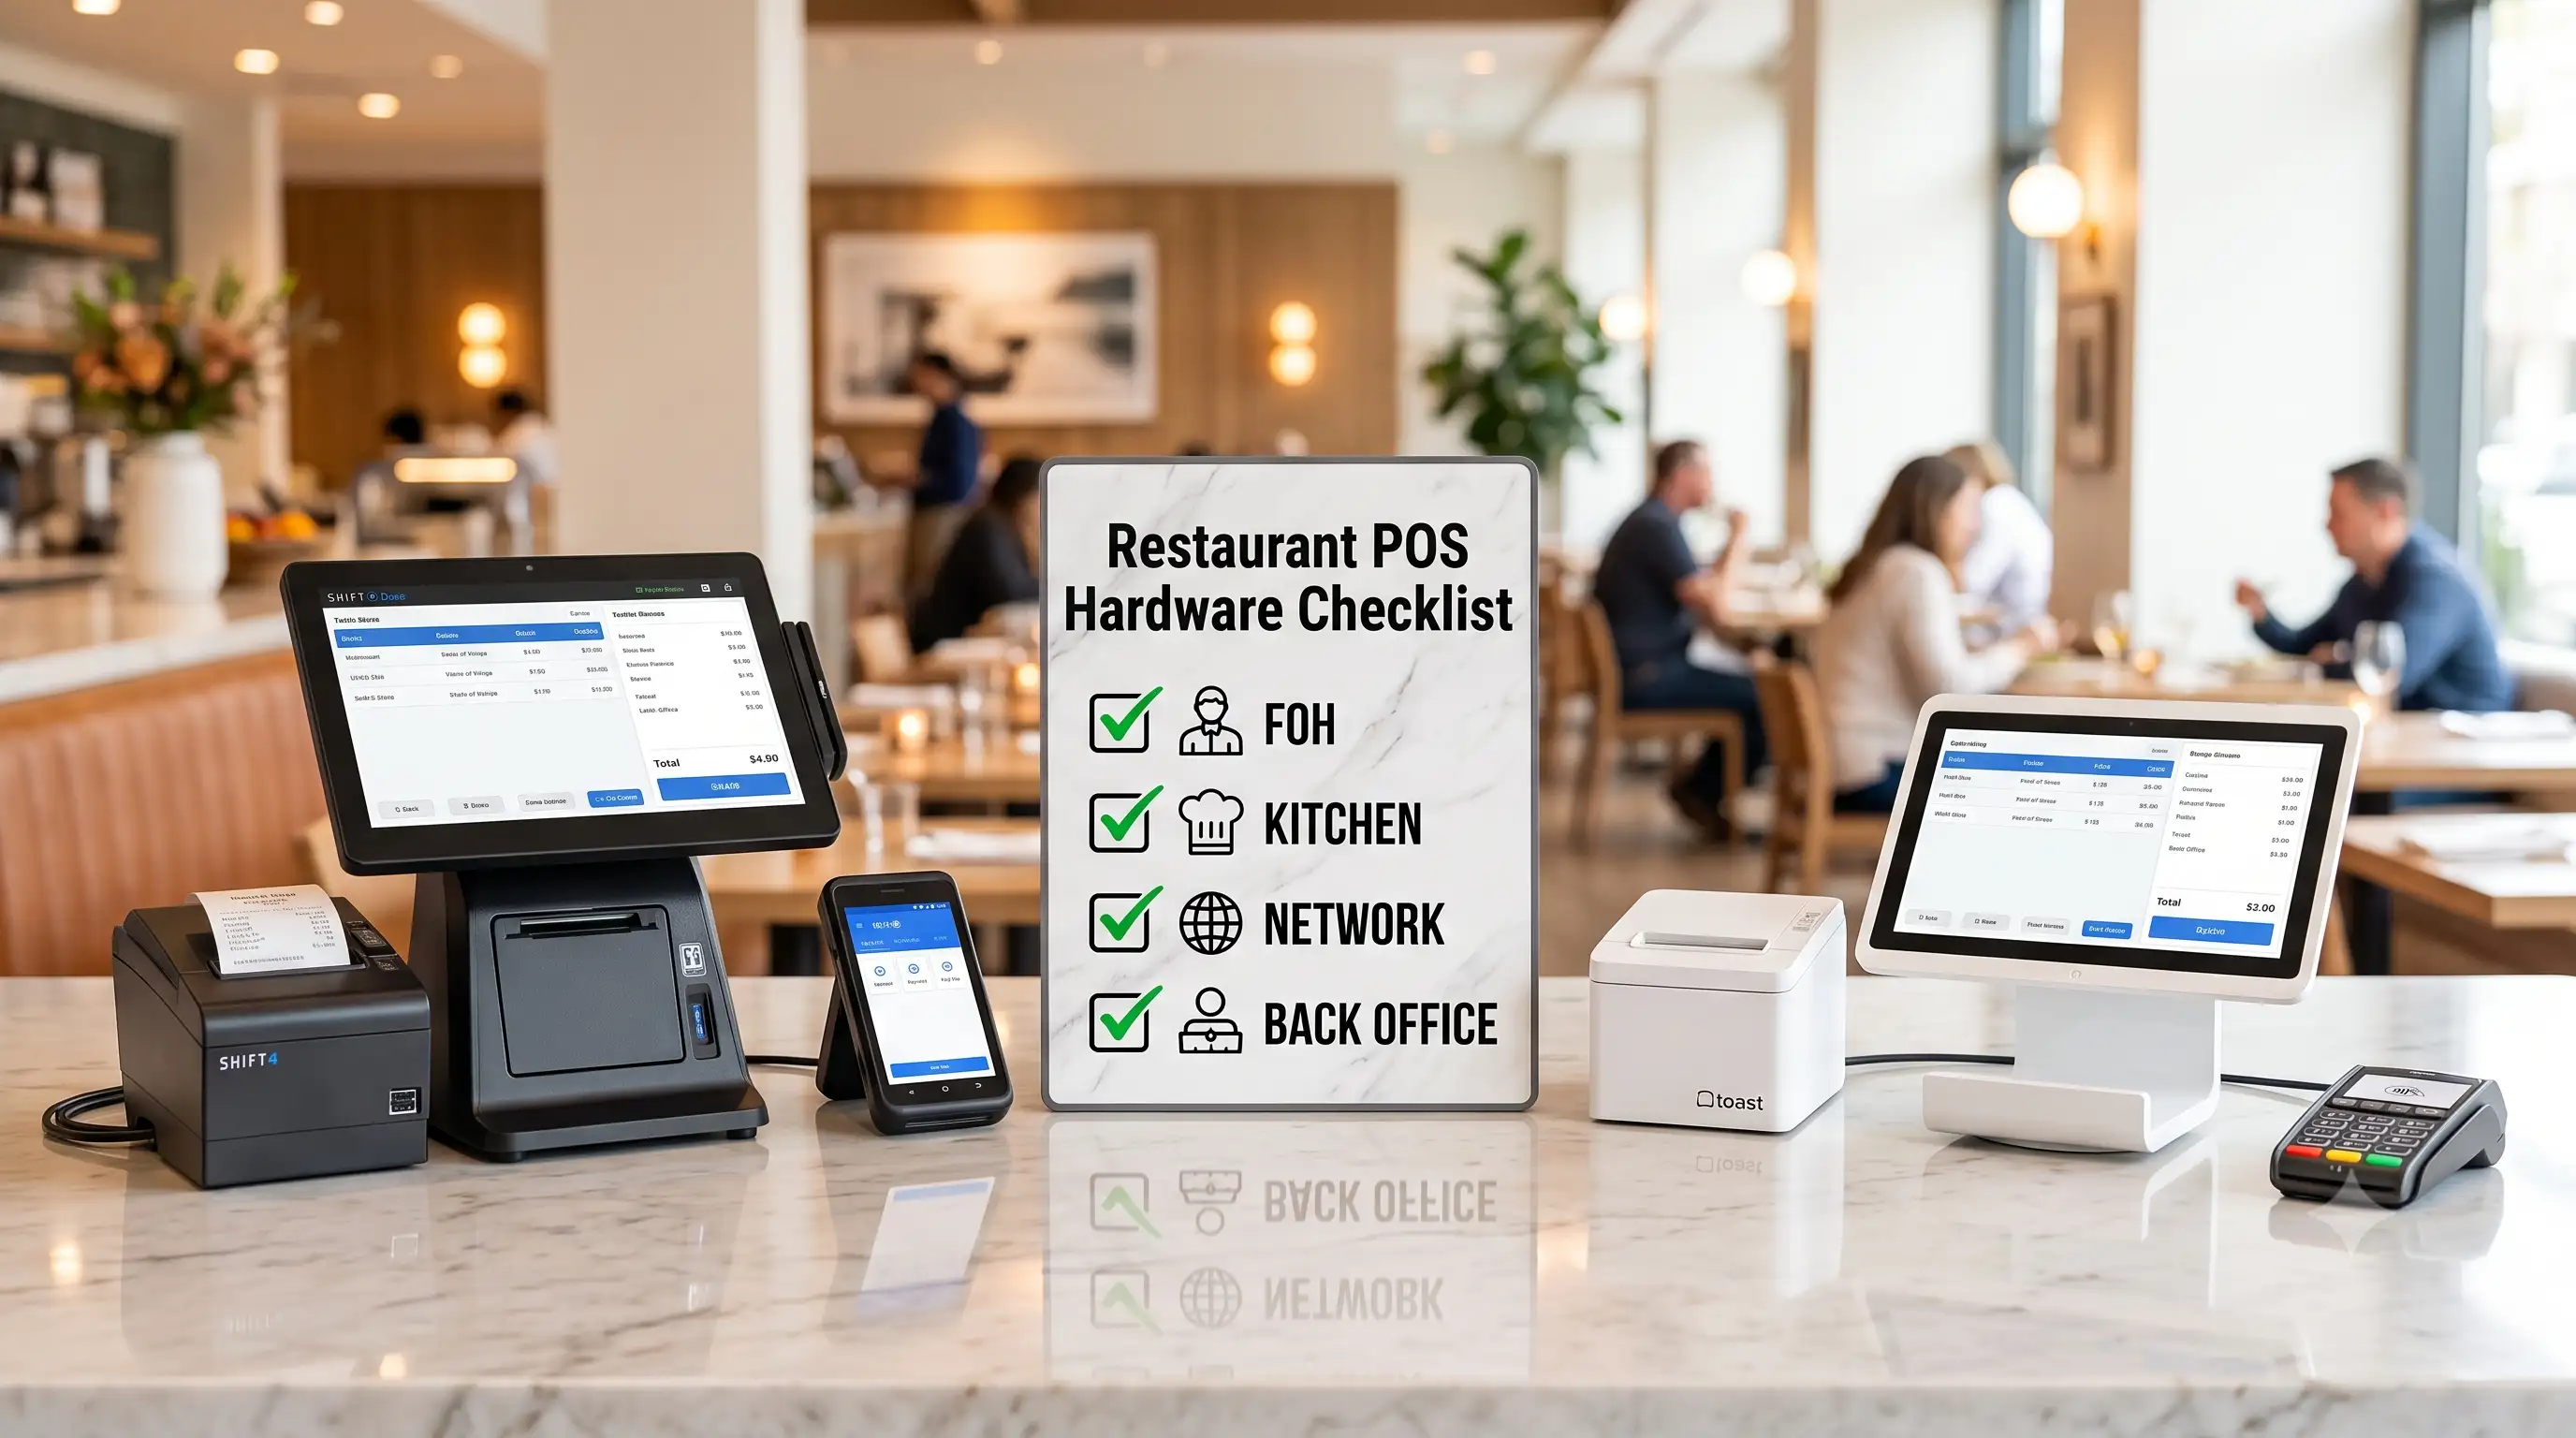
Opening a restaurant with the wrong POS hardware is expensive in a very boring way. Service slows down, staff invent workarounds, printers fail in the rush, and suddenly a “simple setup” turns into a daily operations problem.
“In restaurant rollouts, hardware mistakes usually start before the first order. Owners buy devices by feature list. Operations run by workflow. If the floor, kitchen, and payment flow are not mapped first, the hardware bundle will be wrong even if every device looks good on paper.” — Max Artemenko, POS Systems Expert & Product Architect, Shift4 Dine (formerly SkyTab POS)
This guide is written for U.S. restaurants, cafés, pizza shops, and bars opening a new location or upgrading an existing one in 2026. The practical guidance here relies on industry standards, vendor documentation, and implementation experience across dozens of real deployments.
TL;DR: A complete restaurant POS hardware setup covers four zones — front of house, kitchen, back office, and network. Start with workflow, not a catalog. Budget for a terminal ($500–$2,000), kitchen routing (printer or KDS), network backup, and payment hardware before pricing anything else. Read the processing contract. Never sign a lease without understanding the total cost over 48 months.
A proper restaurant POS hardware checklist should cover the whole operating loop, not just the front counter. That means front of house, kitchen, back office, and network backup — all four zones, mapped before you price a single device.
At minimum, the checklist should separate must-have devices from supporting peripherals and show where each device lives: cashier station, dining room, bar, expo line, kitchen, manager office, and network closet. In practice, that is what turns a random restaurant POS equipment list into a workable restaurant POS hardware setup.
The standard hardware categories used in modern restaurant environments include POS terminals, handhelds, receipt printers, cash drawers, customer displays, barcode scanners, kitchen printers, KDS screens, and backup connectivity. Supporting governance and security standards also matter around usability and device lifecycle, including ISO 9241, NIST Handbook 44, and ISO 27001.
| Category | Item Description | Specifications & Requirements | Qty | Verification Status (V) |
|---|---|---|---|---|
| Terminal | Countertop POS Terminal | 15″+ Touchscreen (capacitive), spill-resistant casing, multiple USB/Serial ports | ||
| Power Cables & Bricks | Original manufacturer power adapters with secure cable management | |||
| UPS / Surge Protectors | Uninterruptible Power Supply (min 500VA) to prevent data loss during power drops | |||
| Handheld POS | Handheld Tablets / Terminals | 5″ to 7″ rugged mobile screens, 8+ hours battery life, integrated EMV/NFC reader | ||
| Multi-Unit Charging Docks | Centralized charging base stations located in the server station area | |||
| Protective Straps & Cases | Drop-resistant rubberized bumpers, heavy-duty wrist straps or lanyards | |||
| Printers | Thermal Receipt Printers (FOH) | Front-of-house, high-speed 80mm printing, auto-cutter, LAN/Ethernet or Wi-Fi interface | ||
| Impact Kitchen Printers (BOH) | Back-of-house, dot-matrix ribbon mechanism to withstand kitchen heat, loud buzzer | |||
| Printer Consumables Starter Kit | Min. 10 rolls of 80mm thermal paper, 5 rolls of 2-ply kitchen paper, spare ink ribbons | |||
| Cajón de efectivo | Heavy-Duty Cash Drawer | Printer-driven (RJ11/RJ12 connectivity), steel construction, 5-bill/8-coin till layout | ||
| Drawer Keys & Mounts | 2x physical keys per drawer, secure brackets for under-counter mounting | |||
| Pantalla del cliente | Customer Pole / Screen Display | 2-line VFD pole display or 7″-10″ full-color LCD screen for itemization and promos | ||
| Mounting Extension Poles | Height-adjustable mounts to ensure visibility over countertop and payment devices | |||
| Escáner de código de barras | 1D/2D Omnidirectional Scanner | For quick scan of retail items, loyalty QR codes from guest phones, USB interface | ||
| Hands-Free Scanner Stands | Weighted bases allowing checkout operators to sweep items without holding the device | |||
| KDS Screen | Heavy-Duty KDS Monitor | 21.5″+ industrial grade display, high brightness, sealed against heat, grease, and steam | ||
| Kitchen Bump Bars | Tactile, mechanical button layouts with audible confirmation tones, water-resistant | |||
| VESA Wall/Ceiling Mounts | Articulating or rigid steel mounts to position screens securely above prep lines | |||
| Network Backup | 4G/5G Cellular Failover Router | Dual-WAN enterprise router configured for automatic cellular failover during ISP drops | ||
| PoE Network Switch (Managed) | Minimum 8-16 ports, supports Power over Ethernet for clean cabling to IP endpoints | |||
| Shielded Cat6 Network Cables | FTP/STP cables run through conduits to eliminate electromagnetic interference |
The core hardware is whatever keeps orders moving and payments closing. Supporting peripherals improve speed, accuracy, visibility, or cash handling — but they are not equally critical in every concept.
In real restaurant deployments, the core usually starts with:
Supporting peripherals usually include:
The “core vs peripheral” distinction is largely a vendor-defined framework rather than a rigid industry-wide standard — and that matters, because owners often treat every accessory as equally necessary. It is not. A missing kitchen routing device hurts more than skipping a customer-facing display in many table-service locations. A missing backup internet path hurts more than buying one less scanner.
In one multi-counter project, the team had good-looking terminals, decent printers, and clean cabling. They skipped handhelds and network redundancy to stay under budget. Friday service exposed the gap fast. We reworked the setup around mobile order entry and backup connectivity, and the hardware finally matched the operation instead of the showroom.
The cleanest way to plan a POS terminal hardware checklist is by zone. Front of house handles order entry and payment. The kitchen handles production and routing. The back office handles control, settings, reporting, and admin.
A simple zoning model looks like this:
| Zone | Main devices | Why they matter |
|---|---|---|
| Front of house | Workstation, payment device, receipt printer, cash drawer, customer display, barcode scanner, handheld POS | Orders, payments, tips, receipts, line speed |
| Cocina | Kitchen printer, KDS screen | Order routing, prep visibility, ticket control |
| Back office | Admin workstation, document tools, network gear access | Menu changes, permissions, reporting, troubleshooting |
| Network layer | Router, Wi-Fi, switch, network backup | Keeps all zones connected |
Modern cloud-based restaurant systems commonly connect these zones through cloud sync and real-time status updates rather than a classic local server-only model. That is directionally useful, but restaurants should still verify exact architecture with the vendor.
Hardware should be bought by zone and by workflow. Not by catalog page.
Technology decisions need to be made early. Getting this wrong is one of the most common reasons new restaurants scramble through their first weeks of service.
Here is a reliable planning window based on industry practice:
The operator who orders hardware five months out negotiates differently than the one calling vendors six weeks before opening day. That gap in leverage is real money.
To choose POS hardware for a new restaurant, start with workflow, service style, and peak-hour pressure. Budget matters, but budget without workflow usually leads to buying the wrong devices cheaper.
My recommendation is to define five things before pricing hardware:
That is the real version of “Define Your Business Needs,” “Set Your Budget,” “Consider Ease of Use,” “Check Hardware Compatibility,” and “Check for Flexibility and Scalability.” Five questions, not five marketing bullets.
Your hardware should match how orders move. That sounds obvious. It still gets ignored all the time.
A quick-service counter, full-service dining room, bar, and café do not need the same hardware ratio.
Based on vendor documentation and broader industry trends:
Mobile ordering and payment can meaningfully reduce wait time pressure in high-traffic formats. Use that as a directional signal, not a universal guarantee for every restaurant.
A practical mapping looks like this:
| Format | Best hardware mix |
|---|---|
| Quick-service | 1 main workstation, multiple handheld POS, receipt printer, customer display |
| Full service | Host or bar workstation, server handheld POS, kitchen printer or KDS, payment-at-table capable devices |
| Café or bakery | Counter workstation, receipt printer, customer display, barcode scanner if retail items are scanned |
| Bar | Bar workstation, handheld POS for floor tabs, kitchen or bar printer, backup payment path |
From my experience, bars and patios expose weak hardware planning faster than dining rooms. Staff move more. Guests pay in more places. Signal quality matters more. Battery discipline matters more.
“The hardware decision is really a workflow decision wearing a technical costume.” — Max Artemenko, Shift4 Dine
A good restaurant POS hardware setup should scale without forcing a full rip-and-replace. That means choosing hardware that can accept added terminals, extra printers, another KDS screen, more handheld POS devices, and replacement units without redesigning the whole stack.
Vendor guidance commonly places active hardware life in the 3–5 year range, with many operators budgeting around 4 years for upgrade planning. That is consistent with the practical reality of commercial wear, battery decline, and payment standard changes. Consumer tablets in a kitchen environment often need replacement earlier — sometimes within 18–24 months if they lack proper IP ratings.
The smart approach:
One operator opened with one fixed terminal because lunch traffic looked modest on paper. Within two months, online pickup and bar traffic collided at the same counter. We added a second station and mobile order entry instead of replacing the whole setup. Cleaner upgrade path, less staff friction, no full rebuild.
Planning resources for POS network infrastructure requirements are worth reviewing before you finalize your hardware layout.
Hardware is where quotes go to hide. The same vendor will show one operator a $0-upfront package and another a $12,000 equipment list for the same restaurant. Neither number is a lie. Both are incomplete.
POS hardware is mostly commodity equipment with public prices. You can price out your build before a sales rep walks in — and you should, because the operator who knows a kitchen impact printer runs around $300 negotiates differently than one hearing “kitchen printing station” for the first time.
Here are 2026 street-price ranges from published vendor price lists and hardware guides. Prices move — treat every figure as a range and re-check against current quotes before finalizing your budget:
| Hardware item | 2026 street price range |
|---|---|
| POS terminal / workstation (iPad-based or purpose-built) | $500–$2,000 per station |
| Handheld POS device | $400–$630 each |
| Tablet-based KDS screen | $150–$600 per station |
| Purpose-built KDS (heat-rated) | $900–$2,000+ per station |
| Thermal receipt printer (e.g., Epson TM-m30 class) | $290–$310 |
| Impact kitchen printer (e.g., Epson TM-U220 class) | $225–$350 |
| Cajón de efectivo | $130–$320 |
| EMV PIN pad / standalone card reader | ~$275 |
| Barcode scanner (2D, Zebra class) | $180–$225 |
| Dual-WAN router with LTE failover | $300–$550 + ~$30–$50/month data plan |
Three complete build estimates (hardware only — software, per-device fees, and installation are extra):
If a quote lands far outside these bands in either direction, ask the vendor to walk you through the line items. Suspiciously low usually means a lease or a processing-rate trade. Suspiciously high usually means accessories you do not need yet.
The essential front-of-house stack is the hardware that takes orders, accepts payment, prints or displays customer output, and supports the cashier or server under pressure. For most restaurants, that means a workstation or terminal, payment device, receipt printer, and often a cash drawer.
Other front-of-house devices like customer display, barcode scanner, and handheld POS may be required by workflow rather than by law. The distinction matters when you are building a first budget.
The terminal or workstation is the anchor point of front-of-house operations. It should be fast enough for peak order entry, physically stable, and easy for new staff to learn on day one.
Commercial POS hardware should meet baseline durability expectations. Minimum IP54-level protection is a practical target for exposed FOH electronics — that means resistance to dust and splashing water from any direction, which matters in the messy reality of a restaurant counter. Standards such as IEC 60068-2-6 y ISO 20653 provide the technical framework for evaluating durability and environmental resilience in commercial electronics.
Whether you need a customer display depends on concept and payment flow:
A escáner de código de barras is not universal in restaurants. It becomes more relevant when you sell packaged retail items, grab-and-go products, bottled merchandise, or inventory-coded items. For bars specifically, a 2D barcode scanner is essential for fast, compliant ID and age verification — integrating a 2D imager to scan drivers’ licenses is the standard approach. Serving alcohol to underage patrons, even unwittingly, can result in fines, loss of license, or criminal exposure. For many classic full-service restaurants without a bar, it remains optional.
The exact technical specs common in commercial FOH hardware include 15–22 inch displays and business-grade memory and processors. Compatibility with the chosen POS platform matters more than raw specs alone.
If you accept cash, the receipt printer and cash drawer pairing still matters. It is boring hardware. It is also where a lot of front-counter friction starts.
Drawers often connect through the printer using RJ11/RJ12 trigger connections or other supported interfaces, depending on model. That is why compatibility has to be checked before you buy mixed-brand hardware — “it should work” is not a support ticket resolution.
A practical FOH counter setup should answer four questions:
The table below covers the most common FOH devices. The key takeaway: not every device is required in every concept, but skipping the wrong one — like a cash drawer in a cash-heavy operation or a barcode scanner in a bar — creates friction that compounds over every shift.
| Tipo de dispositivo | Main Purpose | Where Used | When Required |
|---|---|---|---|
| Countertop POS Terminal | Main order entry, guest check management, and cash drawer control. | Cashier stations, host stands, and main bar counters. | Essential for any stationary checkout setup or legacy workflows. |
| Handheld POS Tablet | Line-busting, tableside ordering, and pay-at-table processing. | Dining room floors, outdoor patios, and drive-thru lanes. | Highly recommended for full-service restaurants looking to increase table turnover and reduce wait times. |
| Thermal Receipt Printer | Providing physical payment receipts, credit card slips, and shift reports. | Directly adjacent to countertop terminals or inside waiter stations. | Essential for compliance with local financial regulations and standard customer service. |
| Cajón de efectivo | Secure storage of cash, coins, physical receipts, and manual drops. | Mounted underneath or directly below countertop POS terminals. | Essential if the establishment accepts physical cash payments. Optional for 100% cashless venues. |
| Customer-Facing Display (CFD) | Showing real-time order itemization, taxes, and promotional marketing content. | Facing the guest at quick-service counters or bar checkout zones. | Highly recommended for quick-service restaurants (QSR) to ensure order accuracy and increase transparency. |
| Escáner de código de barras | Scanning retail merchandise barcodes, employee ID cards, or digital loyalty QR codes. | Main checkout counters, grab-and-go sections, or gift shop areas. | Required if the venue sells pre-packaged goods, merchandise, or relies heavily on mobile loyalty apps. |
Kitchen hardware should do one thing well: get orders to production clearly and consistently. The decision is not “paper or screen” in the abstract. It is which method survives your kitchen conditions and keeps tickets moving without creating new problems for the line.
For more on evaluating kitchen display screens (KDS) in a live restaurant environment, the linked resource covers the key considerations.
A kitchen printer still makes sense when print workflow is simpler, more rugged for the environment, or easier for staff to trust during rushes.
Use a kitchen printer when:
An important point on printer type: kitchen printers should be impact (dot-matrix), not thermal. The physics are simple — thermal paper darkens with heat, so a thermal receipt printer positioned near a fry station will produce tickets that cook themselves illegible before anyone can read them. Impact printers use ribbon ink and are explicitly designed for hot kitchen environments (Epson positions the TM-U220 series exactly this way). The two-color ribbon on impact printers also gives you red-flagged modifiers for free, which helps catch errors during a busy line.
In one pizza concept migration, the kitchen had solid cooks but weak tolerance for change during dinner rush. We kept the kitchen printer live during rollout, then introduced screens only after routing logic was stable. That reduced training stress and gave the team a fallback path they trusted.
A KDS screen makes more sense when the kitchen needs live queue control, item-level status tracking, expo visibility, and less paper clutter.
That is especially useful when:
Industry reports claiming specific KDS ROI figures — such as “reduces wait times by 15%” — typically lack published methodology and should not be taken at face value. The honest position: KDS often improves visibility and coordination in practice, but precise ROI should be tested in your own operation, not assumed from a vendor brochure.
One practical note on heat ratings: purpose-built KDS units rated for kitchen environments (typically IP65 or better) hold up significantly longer than tablet-based screens placed near heat sources. If the screen sits within a few feet of a grill or fryer, the $900–$2,000 purpose-built option is almost always the right call over the $150–$600 tablet alternative. The replacement math favors the more durable unit within the first two years.
Handheld POS is worth considering when staff move more than the guests do. In table service, patios, bars, and line-busting scenarios, mobile POS terminals often remove dead walking time and reduce station bottlenecks.
The best use cases are the ones where handhelds eliminate extra steps — not just add a new device to manage.
Three strong examples:
Directional figures from the industry suggest:
A Wharton School study of tabletop ordering technology measured sales up nearly 10% and productivity up about 11%. Treat vendor-specific numbers as marketing directionals and the overall direction as real — orders reach the kitchen minutes earlier when nobody walks to a station.
From my own experience, handheld POS helps most when the floor plan creates wasted motion. A compact café with one counter may not need much mobile gear. A busy patio bar almost always benefits from it.
A high-turnover bar was using one main station for both tab opens and closes. Staff kept stacking guests at the rail. We moved payment and tab management to handheld POS on the floor. Queue pressure dropped because the work moved to where the guests already were. Simple fix, real result.
Handhelds only work reliably when the network and charging discipline are planned in advance. The device itself is the easy part.
At minimum, handheld POS needs:
My practical rule: if handhelds are mission-critical, treat Wi-Fi and charging as core infrastructure, not accessories. A dead handheld at 7 PM on a Saturday is a staffing problem, not a technology problem — unless the charging dock was never planned for.
“Max has done a great job from the C/C transition and our SkyTab POS install. We are very happy that they have real technicians to assist. Look forward to doing business in the future with Shift4.” — Client review, Case #12 (via Google Reviews)
A restaurant POS is only as stable as the network beneath it. If the connection is weak, the rest of the restaurant POS hardware setup becomes a collection of frustrated touchscreens. Solid POS network infrastructure planning before opening day saves far more than the cost of the gear itself.
POS traffic should be isolated from guest traffic. That is not optional if you want sane performance and cleaner payment security posture.
The clearest standards-based guidance comes from PCI DSS v4.0, NIST SP 800-121 Rev. 2, and ISO/IEC 27002:2022:
Your WiFi network for POS should not be the same network guests use to stream sports clips at the bar. Industry guidance for business-grade restaurant internet connections recommends a minimum of 50 Mbps download speed on a dedicated business-class line — not residential service.
The practical device mapping is straightforward:
Network backup should be part of the original checklist, not a later upgrade. If internet loss stops orders or payments, the savings from skipping failover disappear fast.
A dual-WAN router with LTE failover runs $300–$550 plus approximately $30–$50 per month for a data plan. On a night where internet goes down during dinner service, that investment pays for itself many times over.
One critical question that operators often miss: what happens to payments if both primary and backup internet fail? Ask your POS vendor explicitly whether their hardware supports offline mode with store-and-forward capability — meaning the terminal can capture and queue transactions locally, then process them once connectivity is restored. Not all systems handle this the same way. For bars and high-volume quick-service operations, offline payment capability is not optional.
What matters operationally:
A failover path built around fault-detection protocols can restore connectivity in under 2 seconds — enough to be invisible to staff and guests during a brief carrier hiccup.
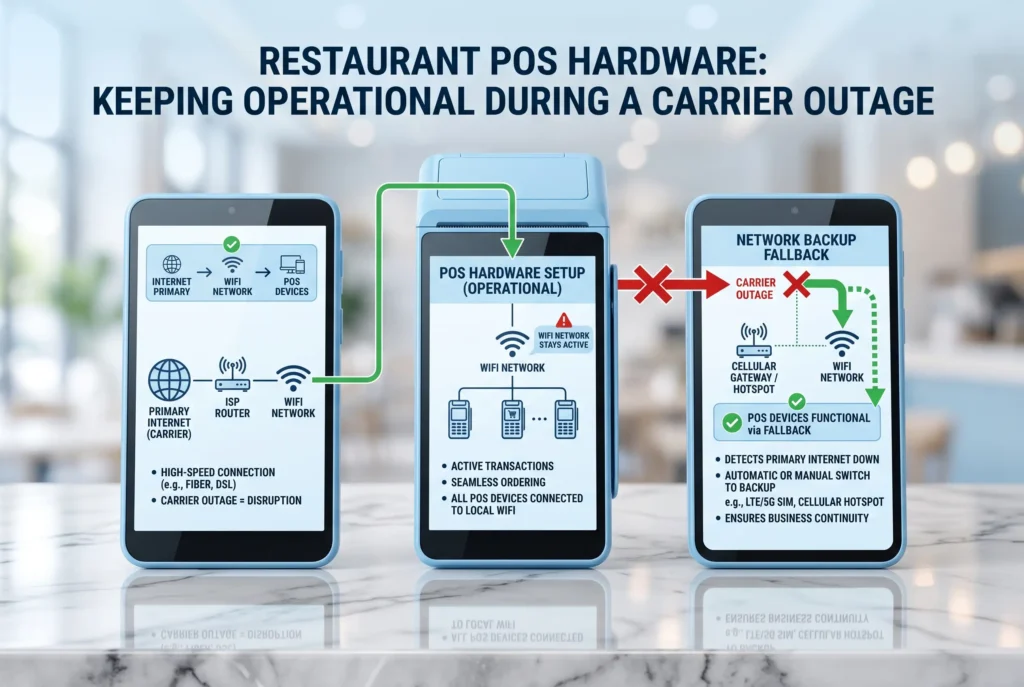
Text version of the failover flow:
Before buying hardware, verify that every device can work with the POS software, payment environment, and each other. Compatibility mistakes are one of the easiest ways to waste money — and one of the most avoidable.
This matters even more in restaurants trying to mix existing printers, new handhelds, legacy payment devices, and a new POS platform. The combination that looks fine on a spec sheet can break in practice.
Check the printer language, connection type, supported drivers, and approved-device list before you assume a mixed bundle will work.
Practical compatibility checks include:
These are not glamorous details. They are exactly the details that break deployments.
If a vendor says “it should work,” ask a narrower question: is this exact model tested, supported, and covered by support if it fails? “Should work” is not a warranty.
Payment hardware can be processor-agnostic or processor-specific. That difference matters before you sign a merchant agreement.
That means your merchant account y payment processing setup can limit your hardware options. A terminal that works technically may still not be certified for your processor relationship.
There is a longer-term financial dimension here that most operators miss: when your hardware is locked to a specific processor, you lose your ability to negotiate processing rates at renewal time. You cannot credibly threaten to switch if switching requires replacing every terminal on the floor. Processor-agnostic hardware preserves that leverage. Fees eat margin — and so does being stuck.
This is one of the most misunderstood offers in the restaurant POS market. Three structures you will encounter, all documented in vendor pricing pages and industry reviews:
1. Hardware-for-processing trades. Some vendors offer $0 upfront hardware and no software fee — at processing rates of roughly 3.1–3.7% plus 15¢, well above standard pricing. On real volume, the spread repays the “free” hardware several times over within the first year or two.
2. Reseller leases. A station that retails around $1,800 can total $4,000–$6,000 over a multi-year lease through third-party resellers. Industry reviews of the Clover reseller channel document this pattern in detail.
3. Non-cancellable equipment leases. The cautionary tale here is the 48-month non-cancellable lease model — terms that keep billing even if the restaurant closes. Industry reviewers consistently rate these among the worst deals in payments.
The arithmetic is straightforward: hardware is a one-time $1,000–$13,000 purchase. A lease or processing-rate trade is a recurring charge engineered to outlast the equipment.
What to check in any vendor offer:
“Free” may be fine. “Free” without contract review is where operators get burned.
A full setup includes all hardware required to take orders, route tickets, accept payment, manage cash if needed, support kitchen production, and recover from device or network failure. The exact bundle depends on concept size and service style.
A minimal bundle for a small café, pizza carryout, or quick-service opening should cover one payment point, one order-entry point, one kitchen-routing method, and one basic backup path.
Typical minimal bundle:
Estimated cost range: $900–$2,600 (hardware only, software and installation extra)
An expanded POS hardware bundle supports multiple order points, higher ticket volume, and more graceful failure handling.
Typical expanded setup:
Estimated cost range: $4,500–$13,000 for a three-terminal full-service restaurant with two KDS stations, two handhelds, three printers, and failover networking
| Hardware Category / Area | Minimal Startup Bundle | Expanded Multi-Station Rollout | Key Differences & Scaling Logic |
|---|---|---|---|
| Front of House (FOH) | 1x Countertop POS Terminal, 1x Cash Drawer, 1x Thermal Receipt Printer. | 3x Countertop POS Terminals, 3x Cash Drawers, 4x Handheld POS Tablets, 3x Thermal Printers. | Scales from a single stationary cashier point to multiple dedicated checkout stations paired with tableside ordering tablets. |
| Kitchen (BOH) | 1x Impact Kitchen Printer. | 2x Impact Kitchen Printers, 3x Kitchen Display System (KDS) Screens with Mechanical Bump Bars. | Transitions from a basic paper ticket routing system to fully digital, multi-line interactive tracking screens for distinct hot/cold stations. |
| Back Office | No dedicated hardware (uses existing manager tablet or personal laptop for Cloud POS access). | 1x Desktop Computer, 1x Standard Document Printer, 1x Uninterruptible Power Supply (UPS). | Establishes a dedicated, secure local workstation on-site for inventory, scheduling, accounting, and cash room management. |
| Network & Backup Infrastructure | 1x Consumer-grade Wi-Fi Router, basic unmanaged network switch. | 1x Enterprise Security Gateway, 1x 4G/5G Cellular Failover Router, 1x Managed PoE Network Switch, Shielded Cat6 Cabling. | Replaces weak residential Wi-Fi with business-grade security routing, hardware power-over-ethernet redundancy, and automatic backup cellular internet. |
Ask vendors operational questions, not demo questions. The goal is to learn how the hardware behaves when something breaks, not when the sales rep is standing next to it.
Start with support and replacement terms. This is where the real difference between vendors shows up.
Ask:
Next-business-day replacement is a standard SLA target in the industry, with demo periods often falling in the 30–90 day range where offered. Verify that in writing — verbal commitments disappear when things go wrong.
“SkyTab POS has been a heaven-sent system for us. The system itself is so user friendly and their staff made the conversion so seamless. I highly recommend SkyTab for anyone looking for a top-notch POS system. They have 24-hour customer service so you have access to getting any issues resolved at any time of the day, 7 days a week.” — Client review (via Google Reviews)
“Max demonstrated strong technical knowledge, which greatly contributed to the successful transition to the new system Shift4. His ability to grasp and effectively explain technical details to me and my staff was impressive. Additionally, his commitment to being accessible and supportive throughout the transition process was noteworthy.” — Client review (via Google Reviews)
What operators actually notice when hardware problems appear: response time, real technicians who show up, and support that does not disappear after the contract is signed.
Then ask the trust questions. These are the ones most operators skip — and regret later.
Ask:
For payment security, look for PCI DSS Level 1 certification and PCI P2PE v3.0 compliance, with annual validation. Restaurants should still confirm current vendor status directly with the provider and relevant PCI listings. PCI P2PE requires AES-256 encryption for data in transit — ask for the specific certification documentation, not just a verbal assurance.
The biggest hardware mistakes are not flashy. They are the small decisions that turn into repeat downtime, rushed replacements, or awkward service flow — and they compound quietly until a busy Friday makes them visible.
Consumer tablets deployed in a restaurant environment with liquid exposure can fail within 12 months. Commercial POS hardware with proper IP ratings — IP54 minimum for FOH, IP65 for harsher kitchen environments — can run for 4–5 years under the same conditions. The cost difference in replacement cycles alone can reach 400% over a five-year operating window.
The principle is solid: restaurant hardware takes abuse. Budget accordingly.
Cheap Wi-Fi and no network backup create invisible instability until the rush hits. A dual-WAN router with LTE failover is a rounding error against one lost Friday night of revenue. Buy it with the original build, not as an afterthought.
Poor wireless infrastructure can produce 15–20 connectivity interruptions per day in a busy environment — enough to measurably damage both revenue and staff morale. That is not a hypothetical. I have seen it in real deployments.
The peripherals nobody budgets for are often the ones staff touch all day: mounts, spare chargers, cable management, extra printer locations, battery rotation, and device placement accessories. These items individually look small. Collectively, they are a four-figure line item — and when they are wrong, staff feel it on every shift.
Buying tip from operators: Keep one spare receipt printer in the back office. A $300 spare has saved more dinner services than any software feature on the market.
The research base does not prove that free hardware always costs more. But vendors offering $0 upfront hardware typically recoup the cost through higher processing rates (e.g., 3.1–3.7% plus 15¢ instead of standard rates) or non-cancellable 48-month leases that keep billing even if the restaurant closes.
Over a typical hardware life cycle, the difference between owning your equipment and entering a processing-rate trade can easily exceed the original purchase price — sometimes by several multiples. Swipe penalties are quiet. They add up fast.
This one does not get enough attention. Operators who start hardware research six weeks before opening end up with whatever is in stock, at whatever price the vendor quotes, with no time to negotiate or verify compatibility. The procurement timeline above exists for a reason. Six months out is not paranoid — it is the window where you actually have options.
The best restaurant POS hardware checklist is the one that reflects how the restaurant actually runs:
That is the difference between a hardware purchase and a working system.
Planning a new opening or an upgrade? Review our current offers on Shift4 Dine hardware, including reliable POS workstations and professional turnkey installation — so your operation runs cleanly from day one.
Disclaimer: The information in this guide is general in nature and does not constitute legal, tax, PCI compliance, or vendor-contract advice. Hardware prices, processing rates, and certification requirements change frequently. Confirm processor terms, PCI scope, device certifications, and contract details directly with your POS provider, payment processor, and qualified compliance professionals. Payment processing and equipment leasing are regulated areas — consult a qualified advisor before signing any multi-year agreement.
TL;DR — The fast answer before you read further: Choose Shift4 Dine if you want bundled hardware, integrated payments, and
TL;DR: Shift4 Dine POS System (formerly SkyTab POS) is now officially presented as Shift4 Dine — same platform, same hardware, same 24/7 US-based support,





|
Other | Other | Other | |
|---|---|---|---|---|
| Upfront Hardware & Software | $0.00 | $5,750.00 | $3,358.00 | $3,798.00 |
| Instalación + Entrada al Menú | $0.00 | $999.00 | No ofrecido | No ofrecido |
| Monthly Support* | $79.98 | $240.00 | $200.00 | $249.00 |
| Total 1st Year Cost | $959.76 | $9,629.00 | $5,758.00 | $6,786.00 |
| Total 3rd Year Cost | $2,879.28 | $15,386.00 | $10,558.00 | $12,762.00 |